


JavaScript ecommerce frameworks are software for building and customizing ecommerce platforms. These frameworks offer multiple ways to integrate with third-party services through their APIs, which allow you to customize, extend, and scale the functionality of an ecommerce storefront.
Some of the popular ecommerce frameworks include:
- Strapi
Magento (adobe commerce)
Shopify
BigCommerce
Swell
Medusa is an open-source digital infrastructure built on JavaScript’s runtime environment, Node.js. Medusa enables developers to build scalable e-commerce stores and maintain multiple infrastructures while writing less code.
This article explains how to build an e-commerce platform with Medusa as the backend. From setting up a server with Medusa to building a storefront using Next.js and demonstrating all the configurations you need to deploy your backend. It also explains the pros of using JavaScript e-commerce frameworks.
Medusa: An Open Source Ecommerce Engine
Medusa provides a set of robust building blocks for custom e-commerce platforms. Medusa's architecture is built with a modular approach, consisting of three components: the storefront, the admin dashboard, and the server.

Alt: Medusa’s architecture
The Medusa Server
Medusa is a headless server built with Node.js. The server handles all the ecommerce functionalities like product management, payments operations, database management, and more. The Medusa server can be customized by creating plugins to integrate custom functionalities or by customizing the abstract layers and APIs.
Medusa's ecommerce server is headless. Medusa’s headless infrastructure means you can plug in any frontend framework for your client-side functionality without interfering with the backend workflows that Medusa runs.
The storefront and admin can be built and connected to the server using their APIs. This means that the frontend is decoupled from the backend, which means you can use any technology to build your storefront.
This separation of concerns ensures that both layers run independently without affecting each other's performance. Also, a change on one part does not have to impact the other.
The Admin Dashboard
The Medusa Admin is a pre-built and customizable dashboard that enables you to manage your store's data and is connected to the backend through the APIs. The Admin APIs contain numerous endpoints that handle functionalities such as:
Managing discounts and promotions.
Management of orders, shipments, and returns.
Creation of pricelists and updates.
Adding regions and service providers for each region.
Retrieving and updating currencies.
You can separate sales channels into the platforms you sell your products in—e.g., mobile and web.
Customer and customer group management.
You can also create custom dashboards from scratch with the Admin APIs. Check out Medusa's documentation to learn about the Admin REST APIs' different customization options.
The Storefront
The storefront is the user interface your customers see when visiting your ecommerce website. Gatsby and Next.js are the JavaScript ecommerce frameworks powering Medusa's storefront. The server also comes equipped with REST APIs enabling you to create custom storefronts that deliver high-performance and seamless user experiences.
Medusa Features
Medusa’s flexibility and the availability of support are part of why Medusa is popular among developers. With Medusa, you have a variety of excellent features as outlined below.
Customer Management and Groups: You can assign customers to groups for special purposes like giving discounts to customers.
Orders, Returns, and Exchanges: You can view a customer’s order details or return information from this section. This feature enables you to create orders, manage order logistics, and authorize returns through the Return Merchandise Authorization (RMA) workflows.
Multi-region and Currency Support: You can enable multiple currencies, tax rates, fulfillment providers, and payment providers for multiple regions from one platform.
Product Management: You can create products and set their details, such as prices, sales channels, etc. Products can also be split into collections based on their function or type.
Promotions: You can set promotions and discounts at checkout. You can set percentage discounts, fixed discounts, or free shipping.
Sales Channels: Create multiple sales channels and set specific prices for each channel.
Import and Export APIs: You can import or export data in bulk for different sections like orders, products, and price lists.
What is JavaScript?
JavaScript is a high-level, client-side scripting language for interactive websites and applications. JavaScript’s lightweight design enables you to create fast and responsive web pages. It’s one of the core languages used across the world wide web and is often paired with HTML and CSS to create content-rich web applications.
Pros of Using JavaScript in Ecommerce
JavaScript is a very popular platform because it can be used for frontend and backend development.
Node.js is also a JavaScript runtime environment for building server-side applications. It’s proof of JavaScript’s extensibility and versatility. Many frontend frameworks use JavaScript syntax to define their components, simplifying learning and working with multiple ecommerce frameworks.
Architectural approaches like Jamstack provide better user experience and web performance. Jamstack combines JavaScript, APIs and markdown to separate the backend business logic from the frontend layer, which helps deliver a better experience to end users.
JavaScript ecommerce frameworks come equipped with boilerplate components to reuse across your ecommerce storefront. Using frontend frameworks like Next.js allows developers to create reusable components, improving development time and code quality.
Existing NPM libraries can be used to add features to your storefront, eliminating the need to reinvent the wheel.
Setting up a Server with Medusa
First, you will start installing a Medusa Server.
Prerequisites
These are the prerequisites to get started:
Create the Medusa Server
Install the Medusa Command Line Interface (CLI). This CLI allows installing the server locally:
npm install @medusajs/medusa-cli -g
Next, create a new Medusa project called my-medusa-store. --seed. This creates an SQLite database with dummy data for development purposes:
medusa new my-medusa-store --seed
cd my-medusa-store
medusa develop
Success! You have now created your first Medusa server. Test your server by sending a server request on the command line. Copy and paste this command on the CLI:
curl localhost:9000/store/products
When you open the localhost:9000 on your browser, you'll see JSON's response containing product data like the image below. This indicates that the call to the server was successful.

Alt: JSON response containing product data
Medusa’s server allows you to configure PostgreSQL databases, Redis for job queue management, plugins, and more custom configurations. You can refer to or add configurations in the medusa-config.js file.
You have now installed and configured a server in your local development environment. The next step is to install an admin panel.
**Install Medusa Admin
In this section, you’ll learn how to install and run the Medusa Admin with the server. Begin by cloning into the Admin panel repository and move into the newly created directory medusa-admin:
git clone <https://github.com/medusajs/admin> medusa-admin
cd medusa-admin
Install the packages and dependencies:
npm install
Before running the admin, ensure you’re still running the Medusa server.
Navigate into the directory holding the admin development server and run the following command to start the Medusa admin:
cd medusa-admin
npm run start
Visit the URL [<http://localhost:7000>](<http://localhost>"7000)](localhost:7000>) to get the login page of the admin dashboard.
You can use the demo credentials, i.e., admin@medusa-test.com as the admin and supersecret as the password to log in. You can also create a new admin user directly from the CLI with your credentials:
medusa user -e some@email.com -p some-password
This is the login page you should land on:

Alt: Medusa’s Login Page
You have successfully created an Admin dashboard for your ecommerce platform. You can now manage your products and orders, set prices, and send gift cards from this dashboard. You can change the regions, currencies, tax requirements, and more from the settings page.
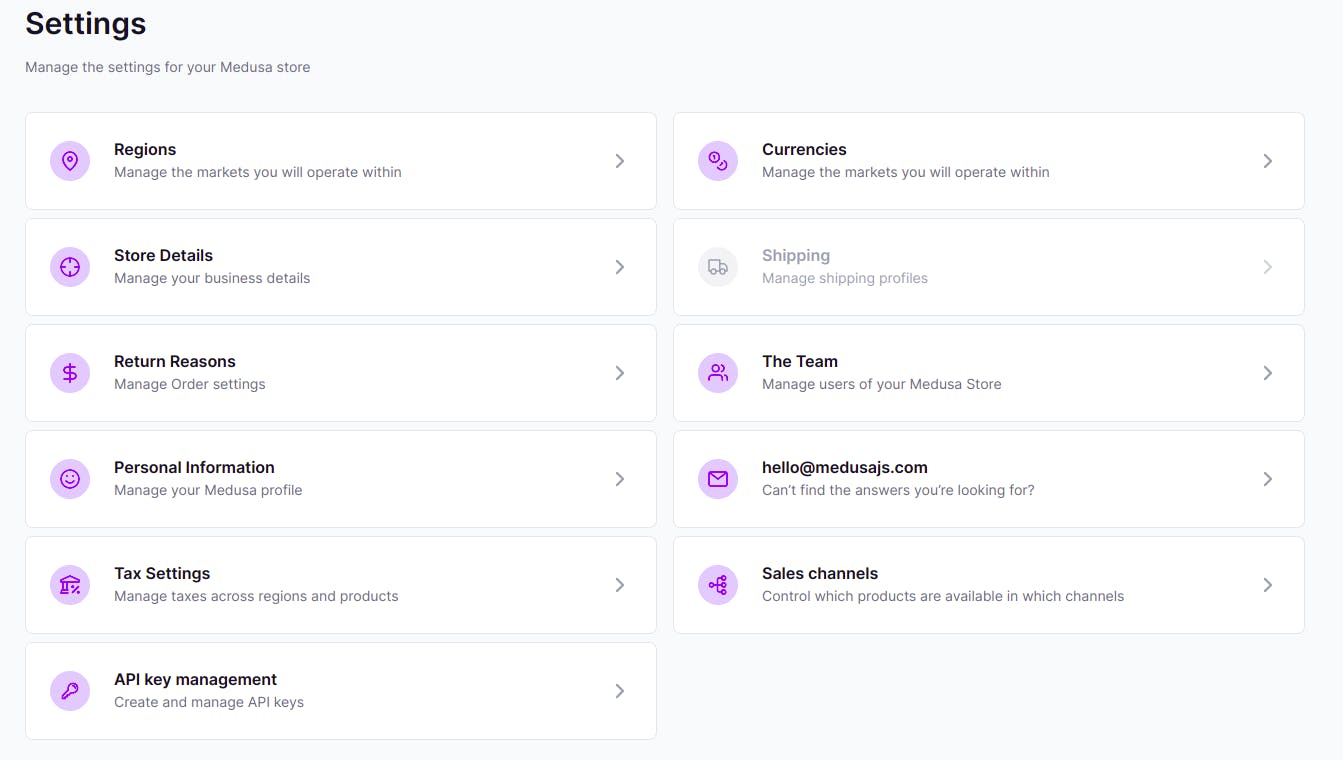
Alt: Medusa’s Settings Page
Build a Storefront with Medusa and Next.js
In this section, you will learn how to install a Medusa storefront with Next.js. Move into the project directory, which in this tutorial is the my-medusa-store, and install the Medusa Next.js starter pack:
npx create-next-app -e <https://github.com/medusajs/nextjs-starter-medusa> my-medusa-storefront
Change into the my-medusa-storefront directory and rename the .env.template file to .env.local to use local environment variables:
cd my-medusa-storefront
mv .env.template .env.local
Next, ensure the server is still running on the local Next.js server in the storefront directory:
npm run dev
You can then view your products from the storefront and use functionalities such as a cart, checkout, and customer accounts.

Alt: Medusa’s Storefront
Build a Custom Storefront with Medusa
You can create your storefront with any frontend framework of your choice. Aside from the REST APIs, Medusa provides the following tools to facilitate the process:
Medusa React: This React library provides a scaffold of hooks, utilities, and components to expose your React application to Medusa's backend server. Medusa React is a great option for building a React-based storefront.
Storefront Starter Templates can be used as a starting point for building unique storefronts, including issuing gift cards, managing regions, enabling customers to make orders, viewing products, etc.
Conclusion
In this article, you learned about JavaScript ecommerce frameworks and the pros of using one. You also learned to set up a complete Medusa platform: the server, admin dashboard, and storefront.
This tutorial demonstrates how composable architecture simplifies ecommerce workflows and allows you to build custom tools that scale with your business. Here are some resources that can help you learn more about Medusa:
Explore and install plugins for payments, fulfillment providers, inventory management, and more.
Create services to perform multiple tasks across your server, and
Use entities to define data uniformly and easily interact with it in your databases
Create subscribers to handle events and allows you to perform various actions when an event occurs.
Check out Medusa’s API reference for endpoints available for your ecommerce platform. Learn more about Medusa and start building excellent custom ecommerce solutions.