Consuming and rendering data from APIs is akin to knowing how to write "hello world". It's a right of passage for every developer if you plan on building scalable software solutions.
APIs are like the invisible heroes that keep applications connected. Without APIs, applications would be bloated and we would not have an efficient way to borrow information or services from other applications into our own. APIs also connect the frontend to the backend so you can share, store and render data across your app.
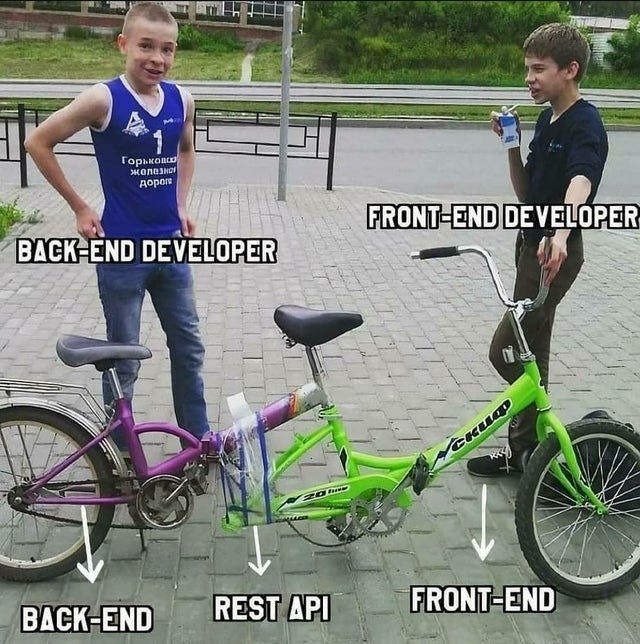
PS: On a typical day in development, the frontend team is often hounding the backend to send endpoints, and yes, we may end up with a product that looks like this meme 😆

A Brief Intro into APIs
A web API is a medium that fetches data from a database and injects it into your application. The most popular API used in web applications is the Representational State Transfer API commonly known as RESTful API. APIs use HTTPS request methods to interface data into your app. They're like the "keywords" or protocols that access the database and return the data from the server. There are 4 common methods used by HTTP requests:
POST - sends or "posts" data to an endpoint
GET - requests or "gets" data from an endpoint
DELETE - deletes data from an endpoint
PUT - updates or "puts" values at an endpoint
Notice how each keyword describes the particular action it performs? - it's a good way to remember which request to use for a particular action.
PS: An endpoint is a unique URL that accepts requests and sends back a response in the form of data. In literal terms, it's the "end" of an API connection/
Enough of the talking let's get to the code!
Using the Fetch API
The fetch() method is a built-in API in JavaScript for handling HTTP requests. It's built-in because you don't have to install libraries to use it so you can simply call when writing code, and it will expose its functionality. Before ES6+, XMLHttpRequest was the default way for making API requests. The Fetch API came with ES6+ to provide a more efficient and promise-based approach to handling data.
Fetch API Syntax
Fetch () - the API method built into JavaScript
Then () - the fetch method returns a promise called then().
Promise - A promise is a JavaScript object that "promises" to deliver a result from an API call.
Below is a demo of how to use the fetch API with an advice generator app. After fetching from the API, we're chaining promises where we're telling JavaScript to "Store the data we're fetching temporarily in a promise as we fetch the data, then when we get it, you can fulfill the request".
In our case, we're fetching data from the device generator API, then extracting the response to JSON data and storing it in a promise.
import "./App.css";
import Divider from "./assets/images/pattern-divider-desktop.svg";
import button from "./assets/images/icon-dice.svg";

function App() {
  const adviceNumber = document.getElementById("advice-number");
  const adviceText = document.getElementById("advice-text");

  function showAdvice () {
    fetch ("https://api.adviceslip.com/advice")
    .then(response => response.json())
    .then((data) =>data.slip)
    .then((data) => {
      adviceNumber.textContent = data.id;
      adviceText.textContent = data.advice;

    })
    .catch((error) => {
      alert(`Error ${error}`);
    })
  }

  return (
    <>
      <div className="wrapper">
        <h3 id="advice-number">Advice #117</h3>
        <p id="advice-text">
          {`"Lorem ipsum dolor sit amet, consectetur adipiscing elit, sed do eiusmod
        tempor incididunt ut labore et dolore magna aliqua."`}
        </p>
        <img className="divider" src={Divider} alt="" />
      </div>
      <div className="button-container">
        <button onClick={showAdvice} id="button">
          <img className="advice-button" src={button} alt="" />
        </button>
      </div>
    </>
  );
}

export default App;
Using the fetch API and the UseEffect Hook
Another way to perform API calls is by using the Fetch API and the UseEffect hook. We'll still use the same advice generator API project, only this time we're using React's useEffect and useState hooks as well as async/await.
The useEffect allows us to perform a side-effect task of fetching and rendering random advice from an external API without affecting the functionality of our component.
...
import { useEffect, useState } from "react";

function App() {
  const [advice, setAdvice] = useState([])

  const fetchData = async ()  => {
    const res = await fetch("https://api.adviceslip.com/advice")
    const data = await res.json()

    console.log(data)
    setAdvice(data.slip)
  }

  useEffect(() => {
    fetchData
  }, [])

  return (
    <>
      <div className="wrapper">
        <h3 id="advice-number">Advice #{advice.id}</h3>
        <p id="advice-text">
          {advice.advice}
        </p>
        <img className="divider" src={Divider} alt="" />
      </div>
      <div className="button-container">
        <button onClick={fetchData} id="button">
          <img className="advice-button" src={button} alt="" />
        </button>
      </div>
    </>
  );
}

export default App;
Using Axios and useEffect
Axios is a popular library for sending, receiving and posting HTTP requests in web applications. With Axios, the output is not too different from using the fetch API, and the fetch API will still reproduce the same results when you use Axios.
However, there are subtle differences & similarities between the two libraries:
Axios is compatible with older browser versions compared to the fetch API, which mostly works on modern browsers.
Axios and Fetch API use Promises and you can chain actions and error handlers, so you don't have to rely on callbacks too much (AKA going into callback hell)
Axios automatically parses JSON data for you, so you don't have to, compared to how you need to parse JSON responses when you use the fetch API.
Now back to our Advice generator app, this is how it looks when we use Axios:
...
import axios from "axios";


 const App = () => {
  const [advice, setAdvice] = useState([]);
  const fetchData = () => {
    axios.get("https://api.adviceslip.com/advice")
    .then((res) => {
      setAdvice(res.data.slip)
    })
  }
  useEffect(() => {
      fetchData
    }, []);

  return (
    <>
      <div className="wrapper">
        <h3 id="advice-number">Advice #{advice.id}</h3>
        <p id="advice-text">
         {advice.advice}
        </p>
        <img className="divider" src={Divider} alt="" />
      </div>
      <div className="button-container">
        <button onClick={fetchData} >
          <img className="advice-button" src={button} alt="" />
        </button>
      </div>
    </>
  );
}

export default App;
Using Tanstack Query (Among other Data Fetching Libraries)
Formerly known as React Query, Tanstack Query allows us to decouple data handling logic from components and provides flexibility for fetching, updating and caching data from various data Interfaces.
The beauty in Tanstack Query lies in its ability to optimize performance for data -heavy applications. With Tanstack Query, you get:
Data caching where data from repeat API calls are cached, reducing the number of API calls to the database, which optimizes performance.
Checks for duplications in API requests, which reduces the amount of redundant requests to the database
Automated garbage collection to free up memory.
Tanstack query is one of the data fetching libraries, you can find plenty more that are suitable for your specific use case.
The basic ingredients in a useQuery hook is a queryKey, query function (queryFn) and an object containing the state of your function (error, loading or success).
Remember the caching benefits we mentioned above? Well, The queryKey is what helps React query & refetch the specific data when you perform an API call. The queryKey acts as the "key" or point of reference to your data in the literal sense.
The query function is the function you'll use to refetch & render the data.
Below is a demo of how to use Tanstack Query in the same advice generator app:
...
import { useQuery } from "@tanstack/react-query";

 const App = () => {
  const [advice, setAdvice] = useState([]);

  const fetchData = () => {
    axios.get("https://api.adviceslip.com/advice")
    .then((res) => {
      setAdvice(res.data.slip)
      const {error, isLoading} = useQuery({
        queryKey: ["advice"],
        queryFn: fetchData,
      });

      if (isLoading) return <p>Loading...</p>
      if(error) return <p>Connection error</p>
    })
  };

  return (
    <>
      <div className="wrapper">
        <h3 id="advice-number">Advice #{advice.id}</h3>
        <p id="advice-text">
         {advice.advice}
        </p>
        <img className="divider" src={Divider} alt="" />
      </div>
      <div className="button-container">
        <button onClick={fetchData} >
          <img className="advice-button" src={button} alt="" />
        </button>
      </div>
    </>
  );
}

export default App;
This article gives you insight into what API handling entails and ways you can handle data in your application. It's a good start to understanding the differences in syntax and functionality, from here you can now manage data across different components with ease. Let me know your thoughts. Till next time 👋!
